Do your students love to share their writing ideas? One of the easiest ways I have found for students to share what they write is with Book Creator. These instruction can guide you to writing your own Book Creator examples.
Book Creator allows students to create their own picture books, chapter books, and graphic novels.
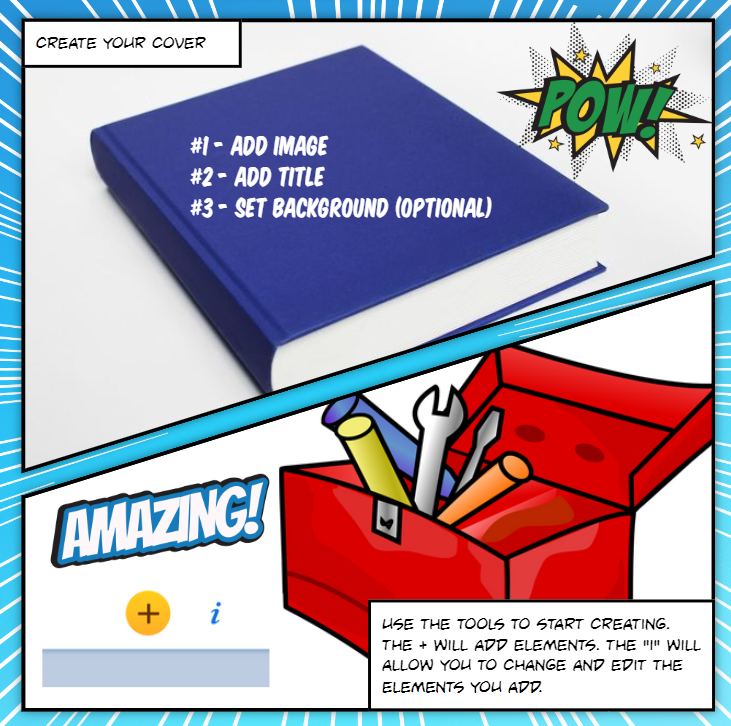
As you start designing your will see 2 buttons on the top right sides. One is a + sign with a yellow circle around it. This button allows you to ADD things (+ = add, simple. Right?) You can add images, text, record your voice, and write with a pen. You can also add shapes, files, and embed a video.
The blue italic “i” allows you to make changes to items you have added.
Steps to get started with making Book Creator Examples.
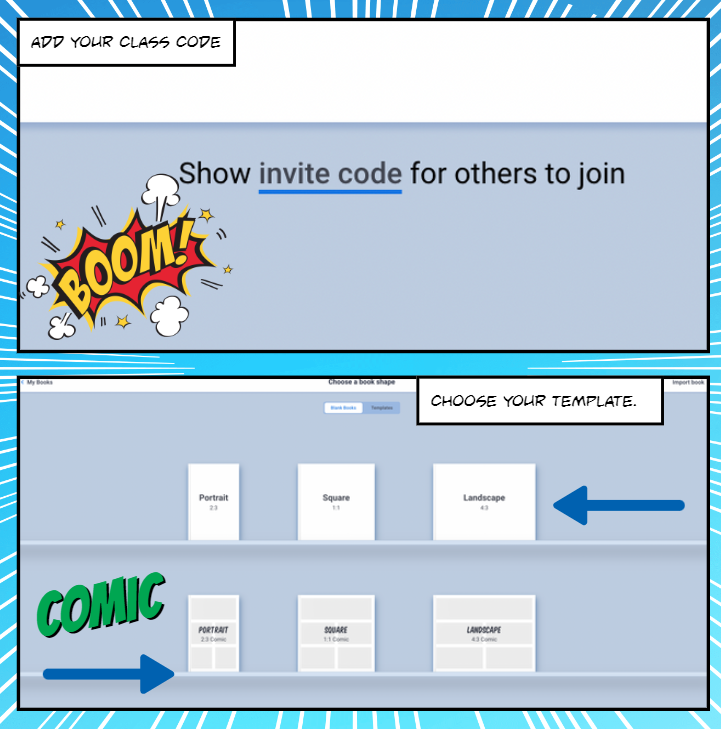
Step 1 – Share Your Class Code
To start, share your class code. Have students go to Book Creator and click the login and sign on. You may want to be sure that your school or district has a Data Sharing Agreement (DSA) with the company. I have students log on with Google Sign On. They are then prompted for a code. You can post your class code and let them join.
Step 2- Choose your Template
You can choose from a square or landscape picture book, a portrait chapter book, or various sized graphic novel/comic formats to create your book creator examples. If you are creating a class book that will be combined together I recommend that you have all students create the same template. This will make it easy to combine and be in the same format.
Step 3 Create your Cover
When creating your cover you can add text, a background, and add an image. Use the tools to start creating. The “+” sign will allow you to ADD elements. The “i” will allow you to change and edit the elements you add.
If you are on the text option, click “i” and you can change the size, font, color, and alignment. You can also add columns, shadows, and bold, italicize, or underline.
Step 4 Creating a Comic
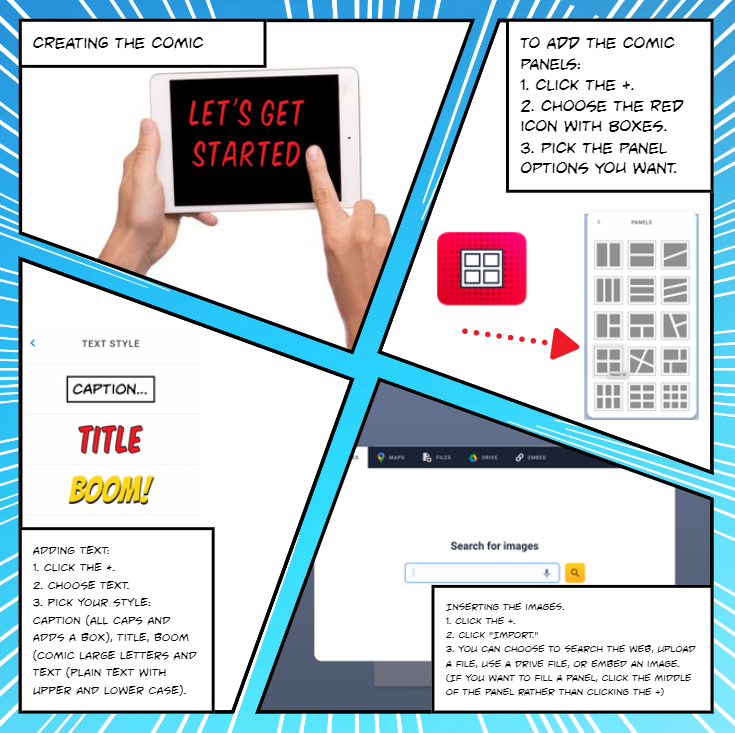
To add the comic panels, click the “+” sign. Choose the red icon with boxes. Pick the panel options you want to use.
When inserting the images on comic, be sure to click the + in the middle of the panel and not the add image from the tool kit. You will click the +, click what you want to add. You can choose to search the web, upload a file, use a drive file or embed and image. If the image doesn’t fit quite right, double click the image and then you can move it to fit the panel correctly.
To add the text, click the + sign, choose text, and pick your style. The “caption” option will add the text in all caps and puts a box around it like the text in the images provided.
Step 5 Adding pages
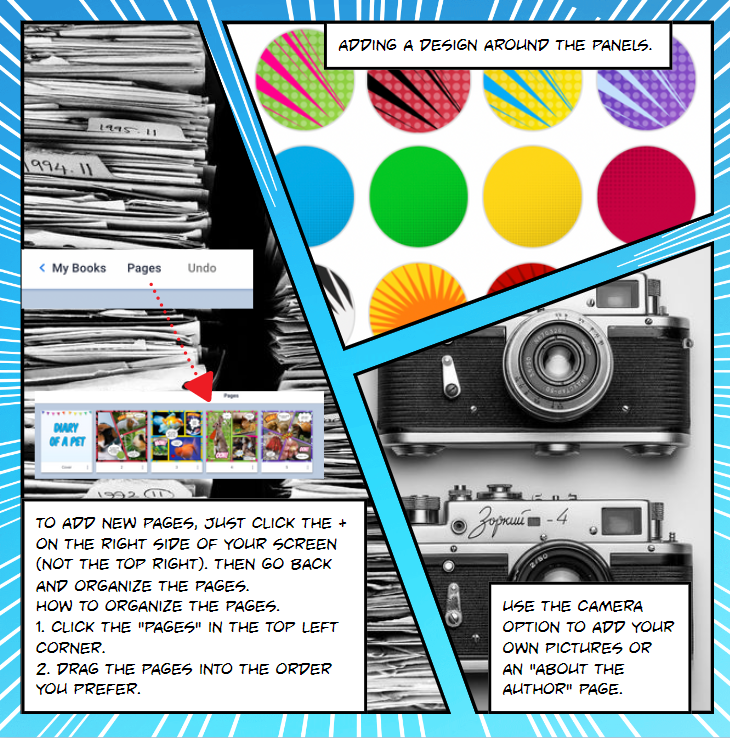
To add new pages, just click the + sign on the right side (not top right) of your screen. You may also see an arrow that will guide you to creating a new page. If you want to change the order of your pages, click the “pages” in top left corner. You can then drag the pages into the order you prefer.
Step 6 Adding design
To add designs around the panels or in the background, just click out of the panels and click the “add background design.” I like to encourage the students to use a consistent design around the panels. This helps the reader not get distracted from the words that they write.
Step 7 Using the camera
The camera option allows you to add your own pictures to your book creator examples. This is a great option for creating an about the author section of your book. When you want to use the camera, click add an image and choose from the camera.
Step 8 Using more tools
There are more tools that you can use to enhance the books.
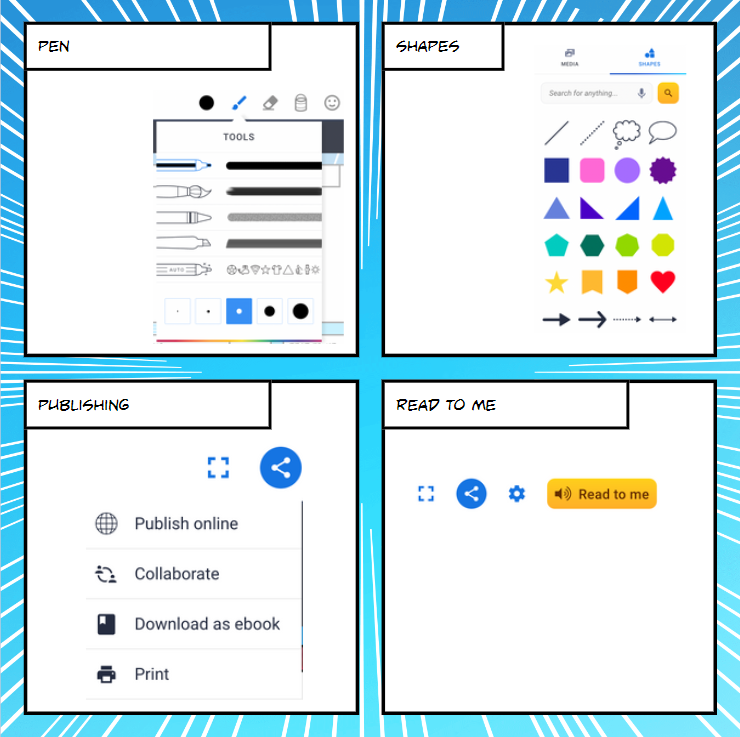
- The pen tool allows you to draw on the page. You can also use the “auto” pen to draw a shape and it will give you graphics that are similar. For example if you draw an oval it will pull up an egg, watermelon, football, etc. This takes the fear out of not being able to draw.
- The shape tool has a variety of shapes, arrows, speech and thought bubbles.
- The publishing tool gives the option to publish online, collaborate with others, download as an ebook, or print.
- The Read to Me tool allows for the book to be read to the reader. This is a great tool to use if you are creating books for students to read on your standards. There is also an option for students to record themselves reading the book.
I hope you enjoy using tool as much as we do in Happy writing and if you want a copy of these instructions you can grab a copy of my book How to Write a Book in Book Creator here.
Need strategies for teaching writing? Try these articles:
I’m so excited to read this one. It’s wonderful!!